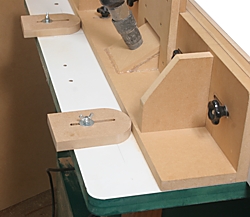
ADJUSTABLE FENCE STOPS

With many router table applications the shape or size of the cutter precludes making light cuts by raising it in stages. With some of these cutters the fence position has to be determined by test cuts. For such situations it is very convenient to have stops behind the fence so that the final position of the fence can be anchored while you make light intermediate cuts.
The stops can simply be blocks clamped to the table surface but the idea is so useful that, provided you can drill through your table top, it is worth making something a little more sophisticated.
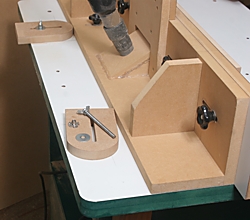
I have made two stops that fit behind the table fence and are adjustable; being held with lengths of 6mm studding, screwed through the table into 6mm pronged T-nuts.
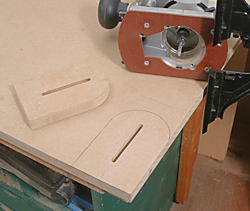
Size is not at all critical. My stops are made from 18mm MDF and are 135mm long by 35mm wide with one end rounded, and a 1/4in slot cut for the fastener.
Begin by drawing the outline of the stop on a piece of 18mm MDF and draw a line down the centre for the fastener to pass through. Cut a 1/4in slot with your router, positioning the cut with the side fence. The slot is stopped about 25mm from each end.
When the slot has been made, cut the stop from the board, trim to exact size and round one end. Repeat for the second one.

Now drill two 1/4in holes through the table top to take the 6mm studding. Draw a 6mm pronged T-nut into the bottom of each hole, pulling them into the table top with the studding, a nut, washer and spanner. (See ‘Building a router table – part 9’ in the ‘Ron’s Tips’ section for more details).
Fasten the stops with the home-made fasteners through the table top.

You will find many uses for these simple stops.
As an example we used them in the Drawer Lock cutter review to switch the fence from the side of drawer position to the front of drawer position.
