FIVE TIPS FOR BASIC DOVETAIL JIGS
Using a fine height adjuster
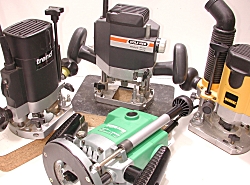 A fine height adjuster – of the kind that prevents the router rising on its plunge legs if the plunge lock is inadvertently released – isn’t only very useful for setting the exact depth of cut, but also acts as a valuable safety device. Several of the basic jigs operate with a guide bush of smaller diameter than the bottom of the dovetail cutter. If the plunge lock is released or works loose and the cutter tries to come up through the guide bush, it’ll wreck cutter, bush, and probably the template. The fine height adjuster stops this happening.
The photo shows four routers fitted with fine height adjusters.
Setting the template comb
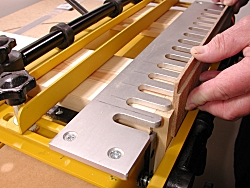 Several of the basic dovetail jigs require that the front of the comb is set back about 3mm from the outside edge of the vertical board. You can make a simple gauge for this by gluing two pieces of hardboard together in a ‘step’.
My hardboard gauge is shown being used with the Perform jig.
Setting the stop bar
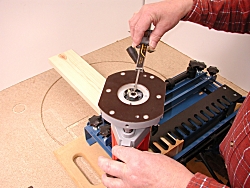 The same type of jig uses a stop bar to control the depth of the drawer front sockets, but instructions for setting it are usually obscure. The easiest way is to measure the distance from the centre of your router base to the edge that’ll be run up against the stop bar, add 20mm to this value, then set the bar to this combined distance back from the front of the template comb. A Vervier gauge is very useful for this.
Now make a test cut and check the depth of the sockets. Adjust the stop bar forward or back according to whether your sockets are too deep or too shallow. When you’ve established the correct depth for a given combination of drawer front and drawer side boards, record this for future use.
The photo shows me measuring the router base.
Making a depth setting gauge
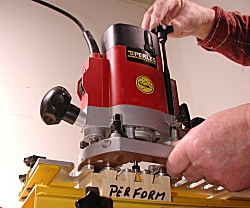 The instructions for the jig specify the depth of cut. This determines the fit of the joint and can’t be varied for different board thicknesses, but manufacturing tolerances lead to slight variations in the actual depth required. When you’ve established the exact depth of cut, by trial and error, for your jig and cutter, cut a row of tails at the required depth and keep it as a setting piece for future use.
Here, a depth of cut gauge is shown in use with the Perform jig.
Making a width board
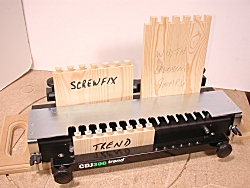 With most basic jigs, you are, to a large extent, at the mercy of your board width. To get symmetrical joints with matching pins and tails at each side you have to trim your boards to a suitable width. It helps if you take a wide board and cut a row of tails in it. You can then use this as a width gauging board when you next make a drawer or box.
Exactly the same idea can be applied to finger jointing if you also have the finger joint template.
Three width gauging boards are shown here, including one for finger joints.
