Trend Self-Centering Mortise Base
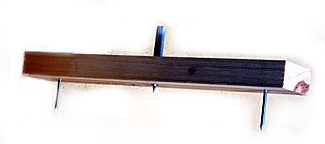
Old time carpenters used to mark the centre line of their timbers e.g. for mortises, grooves etc. with a simple home-made gauge consisting of a length of batten, two nails, and a pencil.
The nails were driven through each end of the batten, and the pencil pushed through a hole drilled exactly mid-way between the nails.
By rotating the nails against the workpiece, the pencil was positioned exactly over the mid-point. The gauge was then drawn along the workpiece with the pencil pressed down, and the centre line marked.
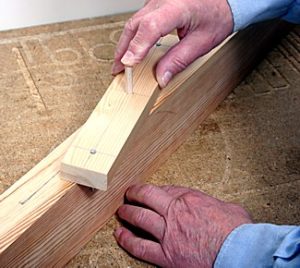
This simple idea can be applied to cutting mortises with a router. An auxiliary base with two pegs taking the place of the nails, and the router cutter taking the place of the pencil, automatically centres the cut.
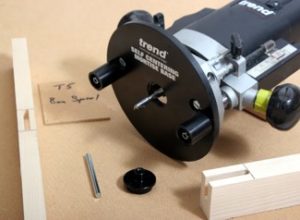
Trend offer a commercial version – the Self-Centering Mortise Base Ref: TEMP/SCM/A – consisting of a circular plate of phenolic board 8mm thick and 169mm diameter, with a central aperture for the cutter and two roller guides to position the cut.
The base is intended for use with a plunge router to cut automatically centred mortises in wood and wood-based products.
The maximum width of timber that the base can fit over is 110mm and the maximum cutter diameter is 16mm (5/8in approx). If you are working to the convention that a mortise should be approximately one third the width of the workpiece, this maximum cutter diameter limits you to materials of about 50mm maximum width, but this covers most framing and cabinet-making applications of the mortise and tenon joint.
Fitting the base.
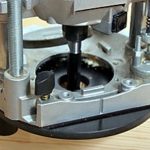
The mortising base fits to the router by means of two 6mm pan head screws through 8mm counter bored holes, to allow for centring. It comes ready-drilled to fit the Trend T5 and all other models with similarly placed fixing holes in their base.
To fit the base, stand the router upside down (one of the many situations where you will appreciate this facility if your model has it) and attach the base without fully tightening the screws.
It is essential for accurate operation that the base is centred on the motor spindle. If it isn’t, the mortise will not be centred in the workpiece. A 1/4in centring pin and bobbin come with the base to centre it. Put the pin in the router collet, drop the bobbin over the pin and push it into the central aperture in the base. This centres it, and the fixing screws can now be tightened.
Check that the rollers move freely. They are held on with locking nuts, which allow them to turn without the nuts working loose.
Using the mortising base.
Insert a straight cutter of suitable diameter and length in the router. Hold the workpiece in a bench vice, Workmate or similar.
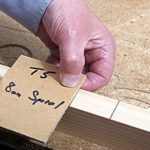
Alternatively, do as I do: clamp it to the bench top and use the clamps to control the length of the cut. Mark the position of the mortise on the workpiece and place the router with the cutter resting on the workpiece just inside one end of the mortise. Twist the router in a clockwise direction so that the rollers are up against each side of the workpiece. Put a pencil mark against the edge of the mortising base. This is where your stop has to go.
Repeat for the other end of the mortise.
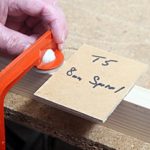
To speed things up, cut a strip of hardboard, MDF etc. to the exact length of the distance from the end of the mortise to the stop line. For subsequent mortises with that cutter, you then just mark their positions and lay off the stop lines with your simple gauge.
Place your clamps on the stop lines and you have a simple method of simultaneously holding the workpiece and setting the mortise stops.
Better still; just use your gauge to position the clamps, without pencilling a stop line.
The way in which you make the cut depends partly on the type of cutter used. In this example I am cutting an 8mm wide mortise in the narrow edge of a length of 32 x 50 mm PAR softwood batten. This comes out as about 27 x 45 mm actual size, and I am using an 8mm Wealden upcut spiral cutter T8U8000C.
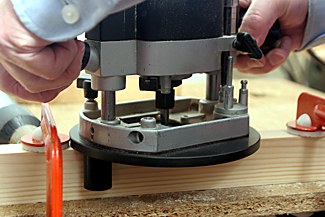
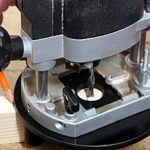
The mortise is cut in a series of light passes. Set the first cut about 5mm deep and position the router at the near stop. Now rotate it clockwise until the rollers are against the workpiece, switch on, plunge to the stop bar, cut to the further stop, release the plunge, and switch off.
By twisting the rollers against the workpiece, they not only centre the mortise but also steady the cut, because being 30mm deep they provide two vertical stabilisers to prevent the router tilting.
Dust extraction.
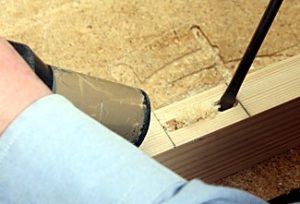
Normal dust extraction attached to the router will not work because the centering base, with its small cutter aperture, covers the cut. The dust and shavings therefore accumulate in the mortise. For most cuts it is necessary to suck or poke out the dust after every one or two passes, to prevent scorch and achieve the best results.
Cutters.
There are two main requirements for a mortising cutter:
It should be of suitable diameter for the mortise, because with the self-centering base the cutter goes straight down the middle of the workpiece, and the cut cannot be widened. It should be long enough to cut the required depth of mortise. It is not always easy to find a cutter with both these properties.
For most of my work I use the 8mm upcut spiral T8U8000C. This gives a beautifully clean cut and helps lift the dust. For the purist it is the appropriate size for 24 – 25mm wide material, which happens to be the size I most often use for framing work. For us non-purists it doesn’t matter too much if the workpiece is a little wider or narrower than 25mm – we just cut the mortise and then make the tenon to fit it.
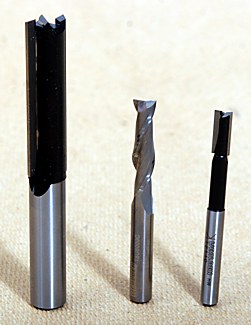
For the widest mortise possible with the centering base, a 16mm (5/8th in) cutter is required. This gives the recommended size of mortise for material of about 50mm width but, again, a millimetre or two either side of this ideal will not make much difference. Wider mortises are also likely to be deeper, so a long 16mm cutter is required.
These are likely to come on 1/2in shanks, therefore requiring a 1/2in router. An example is the 2-flute long straight TX1415M. As with all Wealden straights above 9mm in diameter, this cutter has an additional centre carbide tip for plunge cutting – an essential feature for mortising. It is used in the same way as the upcut spiral.
For narrower mortises, the problem is one of finding a cutter of sufficient length. One solution is to use a pocket cutter, which is a 2-flute straight cutter with extra metal between the shank and the blades. They are available in diameters ranging from 6.35mm (1/4in) to 16mm (5/8th in).
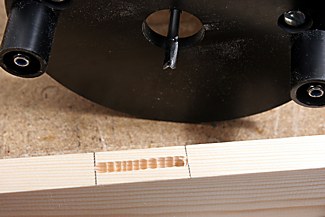
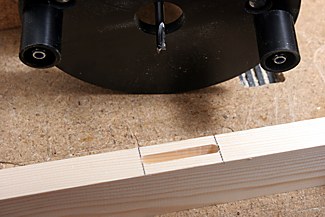
The mortise is cut by plunging to the full depth of cut in a series of overlapping light ‘drilling’ cuts all along the mortise, and then cleaning out the remainder of the material with light passes in easy stages. Practise a few cuts on softwood batten before tackling an expensive piece of hardwood.
The pictures show a 6.35mm (1/4in) mortise being cut in a length of 25 x 50mm material, using the ‘drilling’ technique.
Pocket cutters need to be used with considerable care to avoid breakage, and they require a different technique from that used with spirals or ordinary straights. They should be inserted into the collet right up to the ‘K’ mark and even so might still project through the router base even in the non-plunged position.
A router stand, consisting of a thick piece of wood with a hole in it, is a useful workshop device for parking the router in the plunged position. Note that with workpieces of small cross-section it is necessary to either raise them on a packing piece or have the position of the cut clear of the bench top to allow for the length of the rollers.
Mortises at or near the end of the workpiece.
The illustrations so far show mortises cut within the length of the workpiece. When working at or near the ends, extra lengths of material clamped to the workpiece are required to support the centering base.
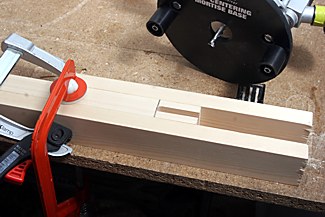
(Note extension battens)
When working right at the end of the workpiece with cutters other than pocket cutters, I use a combination of the two different techniques shown above. I begin by plunging to full depth in a series of light passes at the end of the workpiece and then cut to the inner limit of the mortise in a further series of light cuts. This gives a breakout-free end to the work and is very useful for bridle joints.
Other uses.
The centering base is designed primarily for cutting automatically centred mortises, but several related operations could also be carried out. These include running a groove the length of the workpiece e.g. for T & G jointing, splined joints etc., or making simple frames for panelled work.
Verdict.
The Trend self-centering mortise base is a useful and affordable device for simplifying the task of cutting accurately centred mortises without the expense of a full-blown mortise and tenon jig. It attaches immediately to a wide range of popular routers and can be adapted to many others by drilling appropriate fixing holes. It comes into its own with the sort of mortises that you cut for standard framing applications i.e. blind mortises in material up to about 50mm wide. Its cost is likely to be soon recovered in time saved and spoiled cuts avoided.
It can also be used for grooving boards and panels for T & G and splined joints etc.
It is ideally suited to medium size routers such as the Trend T4 & T5, De Walt DW615 & 621, Makita RP0110C etc., but can also be used with 1/2in shank cutters in larger models such as the De Walt DW 625 and Trend T11 so long as there is a 1/4in collet or reducing sleeve to take the 1/4in line-up pin.
Price: £29.40 inc. VAT.
The tenons.
The self-centering base deals with the mortise half of the joint, but you still have to cut the tenon. There are many ways of doing this; one that I use is with a Wealden tenon/surface trim cutter in a router mounted in my big home-made table. (See ‘Ron’s Tips’ for construction details).
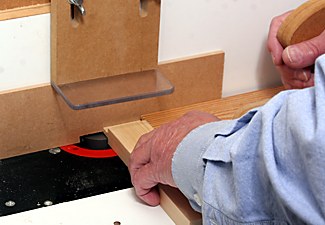
These cutters have four blades: two down-shear for the shoulders of the tenon and two up-shear for the faces. This gives a very clean finish to the cut. The larger versions are best used in a router table but the smaller ones can be used in a hand-held router if required.
The cutters are also very useful for rebating and surface trimming.
Finishing the joint.
Mortises cut with a router have semi-circular ends, while tenons – apart from those cut on the popular mortise and tenon jigs – have square ends. The standard advice is to either square the ends of the mortise with a chisel or round the ends of the tenon with a chisel or rasp. If you are cutting through mortises there is little option but to square their ends, but with most blind-mortise framing applications you do not have to resort to either expedient.
What you do is to leave the mortise as cut, and put a narrow stub shoulder on each side of the tenon.
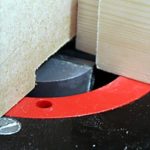
A rule of thumb for the width of the stub shoulder is one half of the radius of the mortise, but this is not at all critical. So, for example, if you cut a 1/2in mortise, the semi-circle at each end is 1/2in in diameter, which gives 1/4in radius. Half the radius is 1/8in so after cutting all the tenon shoulders, you re-set the depth of cut to 1/8in and run all the tenons over the cutter to cut the two stub shoulders.
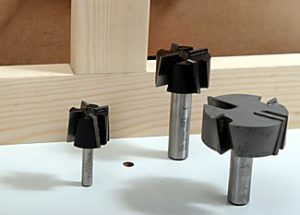
( Note the three Tenon/Surface Trim cutters)
Fitting the stub tenon into the mortise is then the proverbial ‘square peg in a round hole’. The rounded ends of the mortise are bruised slightly square and the square ends of the tenon are slightly rounded. The resulting joint will be more than adequately strong.
The perceptive worker will soon cotton on to the fact that if you cut the mortises a whisker short and the stub shoulders a whisker wide, the tenon will completely hide the ends of the mortise and there will be no ‘half-moon’ visible on each side of the tenon – which is one of the occupational hazards of squaring your mortises.

