BUILDING A ROUTER TABLE – PART EIGHT
Guards and Hold-Downs
Guards
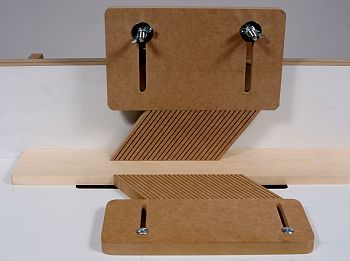
Router tables need guards and hold-downs for safe and efficient working. Many commercial tables are short on these items, especially when pattern routing e.g. making a batch of circular plaques, because these operations involve the removal of the fence and the guards go with it.
The two main guards are the vertical and horizontal pressure guards. These are shown set up in Photo 33 and hold the workpiece flat to the table top and up against the fence. They also keep the operator’s fingers away from the cutter.
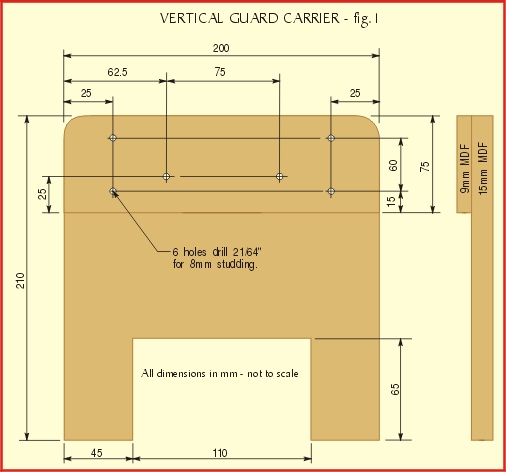
The first stage is to make a carrier, which is screwed to the back of the fence and drilled to take various lengths of studding which carry the vertical guards and allow for different positions.
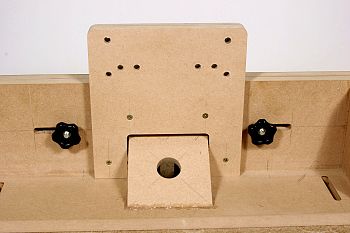
Photo 34 shows the carrier screwed to the back of the fence, with holes drilled in it for 8mm studding. We used a 21/64″ drill to give clearance.
The dimensions of carrier are given in Fig 1 at the bottom of the page. It consists of two pieces of MDF, the main one 15mm and the top 9mm thick.
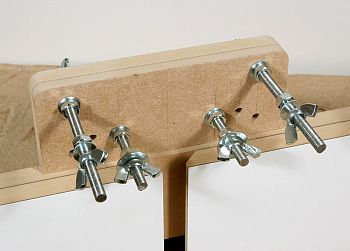
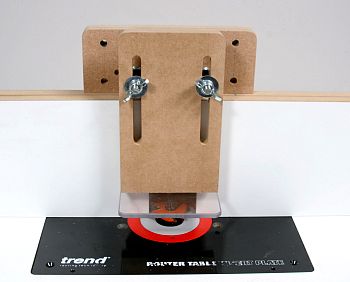
Photo 35 shows the fence from the front with the carrier and lengths of 8mm studding to carry the various vertical guards.
Hold-Downs
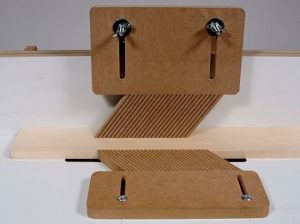
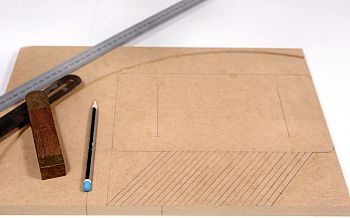
The hold-downs are made from 15mm MDF. Photo 36 shows the vertical one drawn on a scrap piece of MDF.
The MDF is slotted to fit over the studding in the carrier. The slots are cut with the slotting guide shown in Part 4, making the fence. Cut the slots before shaping the guard; it will make positioning and clamping the slotting guide easier. With the 8mm studding, we used a 3/8in straight cutter to cut the slots and used largish washers with the wing nuts.
Having cut the slots, the next thing is to make the slanting cuts for the flexible fingers. These were drawn at 55° and cut on the bandsaw, but a scroll saw or hand saw will equally serve. The cuts were made about 8mm apart to give a reasonable strength/flexibility ratio.
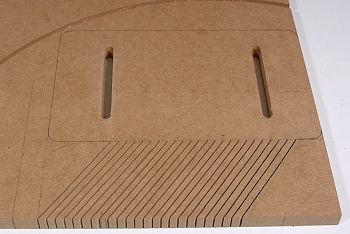
Photo 37 shows the finished slots and fingers. Finally the guard was cut to shape and the corners rounded with a sanding bobbin.
NOTE: Make sure you have enough fingers on the infeed side of the cutter. The shape of the guard makes it very easy to end up with most of the fingers on the outfeed side, and not enough on the infeed side.
A similar piece is cut for the horizontal guard, but with 1/4in slots to take 6mm coach screws so it can be bolted directly to the table top.
Studding
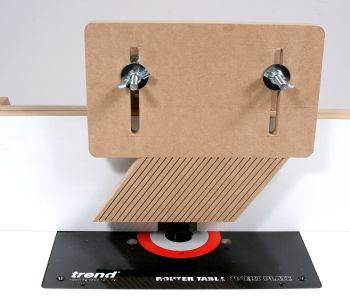
We used 8mm studding with lock nuts to position the vertical guards back or forwards, and wing nuts and washers to hold and adjust them. We bought the studding as a 1 metre length from our local timber supplier. Photo 38 shows the vertical guard mounted on the studding on the carrier.
Holes for the horizontal guard
Two sets of 1/4in holes were drilled in the table top to give a range of positions for the horizontal guard. We used the router for this purpose, fitted with a home-made Perspex drilling base and the Wealden DA1008 router drill.
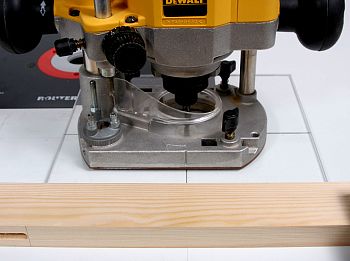
Photo 39 shows the drilling set-up. The router is fitted with a rectangular Perspex base with cross-hairs drawn for accurate positioning. The false base is steadied by running it against a batten clamped to the table top.
The overhead guard
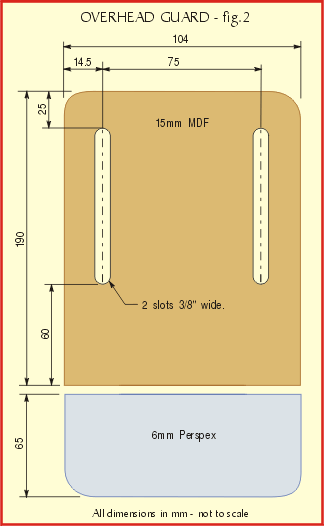
For jobs such as biscuit jointing where you need to see the cutter a second guard is made, consisting of a ‘peak’ of Perspex attached to a sliding piece of MDF. Dimensions are given in Fig 2. at the bottom of the page. With guards such as this we always make an MDF pattern for the Perspex, to reduce the risk of spoiling the Perspex. The rough-cut Perspex is taped to the pattern and shaped on the router table with a flush trimming cutter.
Photo 40 shows the Perspex ‘peak’ being shaped on my little router table. Note the lead-in pin and the dust extraction.
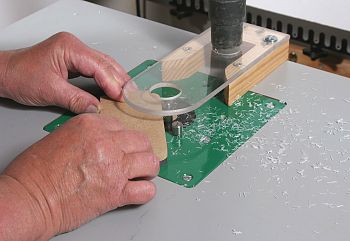
After shaping, the edges of the Perspex were chamfered with a bearing-guided cutter to take the sharp edges off. Photo 44 below shows this operation for the freehand guard. The peak is then screwed to the bottom of the MDF and the guard held on the carrier with wing nuts and studding.
Photo 41 shows the overhead guard in position for biscuit jointing.
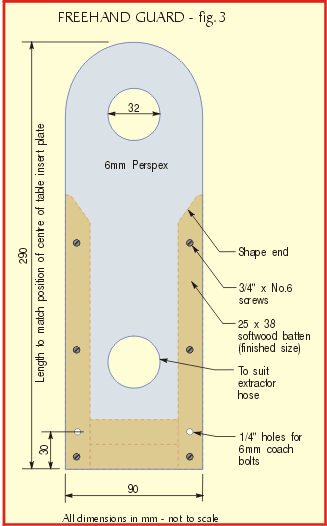
The freehand guard
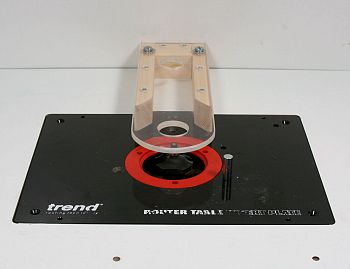
With most tables – home-made or commercial – guards and dust extraction go with the fence and if you take the fence away the guards and extraction go with it. I am not prepared to do freehand routing without guards and dust extraction so I make my own. It consists of a Perspex strip mounted on batten to lift it above the level of the cutter. Two circular holes are cut in it, one to take the extractor hose, the other to give better visibility of the cutter. As with the other Perspex guard we made an MDF pattern first and shaped the Perspex in the same way, on the little router table. Photo 42 shows the shaped Perspex taped to the cutting table with one circle cut and the other in progress. My small-circle cutter (described in an earlier ‘Tip’) is mounted on the router and the cut is lubricated with a silicone spray.
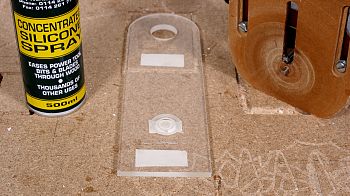
Photo 43 shows the circle cut in progress. A pilot hole is drilled in the Perspex, the radius set with a vernier gauge and the cut made in a series of light passes in a clockwise direction. This job is very much easier if your router has a simple ‘ON/OFF’ switch.
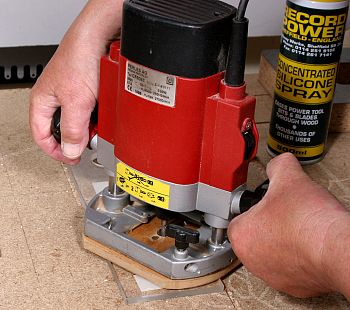
After cutting the holes, the edges of the Perspex are chamfered to take the sharpness off. Photo 44 shows the chamfering operation.
The Perspex is then screwed to the batten and two 1/4in holes drilled to take 6mm coach screws to bolt it to the table top. These holes are drilled in exactly the same way as the holes for the horizontal pressure guard.
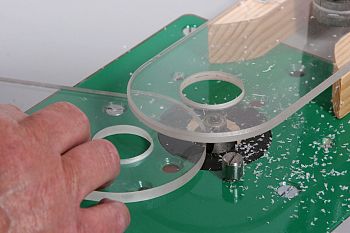
Photo 45 shows the freehand guard in place on the table top. A smaller version can be seen in use in Photo’s 40 and 43 above.
