BUILDING A ROUTER TABLE – PART FOUR
Installing the insert plate
The centre aperture
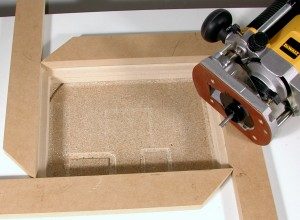
When the perimeter cut has been made, the middle can be cut out with a jig saw, after drilling a 3/8″ hole at each of the four inner corners of the perimeter. A neater way however is to replace the template trim cutter with a long straight cutter and fit a guide bush to your router with a big enough diameter to place the cut inside the perimeter. I used a 32mm guide bush and the Wealden 8mm long shank cutter TL208M. If you have a 1/2″ router you can use a 40mm guide bush with a Wealden 1/2″ cutter TL1412.7M.
Without moving the straight edges, light cuts are taken in a clockwise direction with the guide bush running against the inside edges of the straight edges. Leave the centre packing piece in place and put a piece of double sided tape underneath the table top to prevent the centre moving as you cut through and possibly spoiling the cut.
We found that the Wealden 1/4″ cutter TL208M was just long enough to go through the 31mm top, but near the end we eased the shank out of the collet as far as was safe and took cuts of 2mm at a time.

Photo 10 shows the centre of the table cut out. Note the guide bush and long cutter on the router.
After cutting the aperture I coated the exposed edges of the MDF with furniture wax to help prevent movement with changes in humidity.
With the centre cut out, the rebate for the insert plate can be drilled for the levelling system. This will be described in the next episode.
In the meantime, do not throw the centre piece away; it will make a superior router stand.

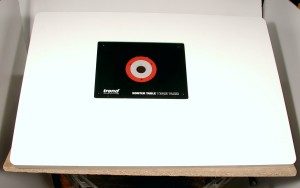
Photo 11 shows the insert plate set in the table top.
