BUILDING A ROUTER TABLE – PART TWO
Laminating the MDF

Both surfaces of the MDF top should be laminated to prevent bowing. I bought half a sheet (5ft x 4ft) of white Formica and cut the two pieces slightly oversize with a Stanley knife against a straight edge. Effectively I deep scored the plastic then bent it gently along the line of the cut.
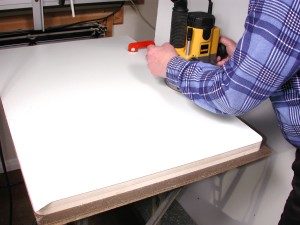
I used Dunlop thixotropic contact adhesive to bond the laminate to the MDF, following the instructions on the tin and applying a thin primer coat to the porous surface of the MDF before the main bonding. You need a 500mm tin for this size table. It helps if you have someone to assist you, to speed up the application of the adhesive and to position the Formica. It takes a surprising amount of time to apply the adhesive to two 3ft x 2ft surfaces, and you only have about 20 minutes to let it go touch dry and bring the two surfaces together. Photo 6 shows the Formica overhang on one surface being trimmed flush with the edge of the MDF. The cutter used is the panel trimmer T8016B.
We laminated the two surfaces of the MDF in one session and left the top overnight before trimming the overhang of the plastic. Although the adhesive ‘dries’ in about 30 minutes it pays to give it time to harden a bit before flush trimming the Formica. If you don’t, the adhesive will still be soft enough to clog up the trimming cutter.
N.B. There are various suggestions as to how to proceed if you are working on your own. One that I have successfully tried is to coat both surfaces with the adhesive, let them become touch dry, then lay newspaper or brown paper on the MDF surface. You then position the Formica on the MDF (and on the paper) and gently lift one end, tearing away the paper. You then press the two surfaces together where you have removed the paper and tear some more away, working along the length of the top. The idea is that if you let both surfaces become touch dry the paper will not stick to either. When you peel the paper away and press the two glued surfaces together they bond instantly. I would much rather work with an assistant though. When the adhesive has been allowed a while to harden, the overhang of Formica is removed with a panel trim cutter. The thickness of two layers of 15mm MDF is more than enough to allow the bearing on the cutter to run between the two layers of Formica. You can actually buy fancy versions of the trimming cutter that will trim both top and bottom layers of Formica with one pass, but I’m content to trim one piece at a time.

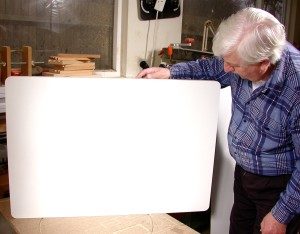
Photo 7 shows the completed laminated top, ready for the insert plate to be fitted.
