GUIDE BUSHES PART ONE – THE BASICS
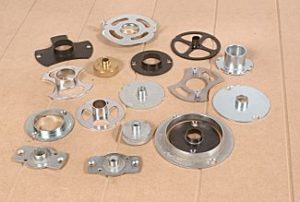
Guide bush work is one of the most creative areas of routing but one of the most neglected. A guide bush is one of the standard accessories supplied with nearly all routers, but reaction from my course students suggests that in many cases it remains unappreciated and unused. There are, of course, a number of well-known commercial applications such as dovetailing, lettering, mitring kitchen worktops etc. but much of the creative work comes from using a range of different size bushes with home-made jigs and templates.
The subject is a large one and in this article I deal with the basics. In subsequent articles I will expand on guide bush applications and the making of templates.
Fundamentals
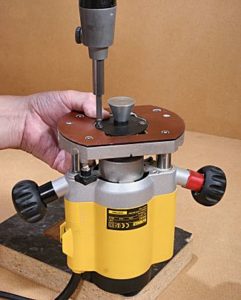
The guide bush is essentially a circular flange, usually between 10mm and 40mm outside diameter, which fixes to the router base and acts rather like a small ring fence. The cutter plunges through the middle of the bush and the outside edge of the ring runs against the jig or template, to position the cut.
The cutter, obviously, has to be of smaller diameter than the guide bush in order to pass through it. It is also important for accurate work that the bush is a perfect circle and that the cutter goes through its centre. Unfortunately, this is not always the case, usually with the cheaper Far Eastern models. Concentricity can be checked and, to an extent, corrected by means of an alignment cone.
(See Alignment Cone in our online shop)
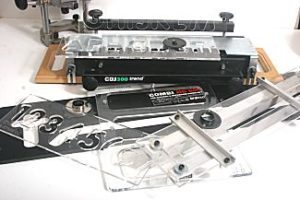
Because the cutter goes through the centre of the bush, the cut is offset some distance from the edge of the template. This offset is the key to understanding creative guide bush work and is probably the biggest stumbling block to the wider use of bushes, but it only arises when you make your own jigs and templates. When you buy a commercial device, such as a dovetail jig or a lettering template, it either comes complete with guide bush and cutter or it specifies exactly what sizes must be used. You don’t even have to know of the existence of the offset. Your main consideration is ‘does the guide bush that comes with this jig fit my router. If not, is there a way that I can make it fit my router?’
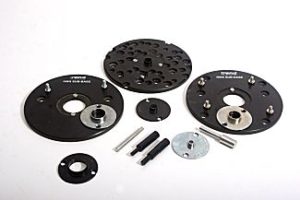
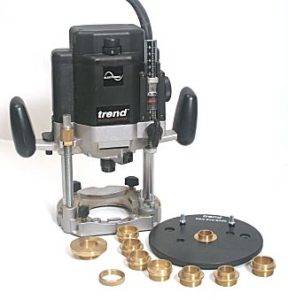
Regrettably, there is no standard size or fitting for guide bushes. The widest range by far is the Elu/ De Walt/Trend system, with a 60mm diameter plate attached to the router base with two 5mm countersunk screws. Most commercial jigs (whoever they are made by) come with a Trend-compatible bush as standard. They fit not only most routers from Elu, De Walt and Trend but also a number of other popular models. If your router does not accept these bushes, and does not include a bush of the required diameter in its own range, you have to make or buy an adaptor plate to take them. Trend offer two such plates: the Trend Unibase and the more expensive Circular Sub-base.
(See in our online shop the Trend Unibase and the Trend Circular Sub-Base)
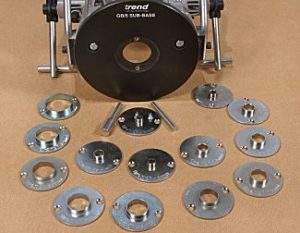
The Unibase fits most routers, including some of the very cheap Far Eastern models.
Tip. When you have located the fixing holes the first time you fit the Unibase, mark them with a dab of paint to speed the process on future occasions.
The Trend Circular Sub-base is a higher quality plate, which you order to fit your particular router. Most popular models are catered for.
A bonus with both these plates is that they come with a centring bush and pin so you can ensure concentricity with the motor spindle.
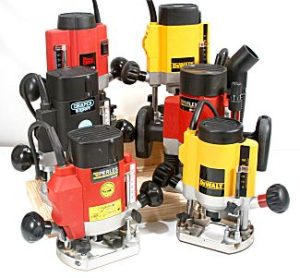
Plastic Guide Bushes
Most guide bushes are of steel construction but Trend offer three boxed sets of plastic bushes. Set 1 is metric in even sizes from 10mm to 32mm, Set 2 is in odd sizes from 11mm to 33mm, and Set 3 is in Imperial sizes from 3/8in to 1 5/16in. These sets offer an economical way of acquiring guide bushes; if you find yourself constantly using a particular size you can buy the steel version.
(See ‘Online Catalogue – Accessories – Guide Bushes and Bases’)
Availability of guide bushes
Guide bush work is essentially a hand-held operation, although there are a few rather contrived table applications. The largest range of guide bushes is to be found, therefore, among medium-power routers with their combination of capability and portability. Heavy-duty 1/2in routers usually come with a 30mm diameter guide bush as standard because that is the size required for applications such as kitchen worktop jigs, lock mortice jigs, and other trade applications, for which the big routers are particularly suited.
The standard 60mm Trend bushes also fit a number of other medium-power routers, although their manufacturers tend not to publicise this point.
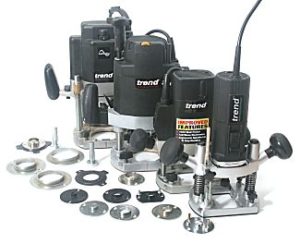
With most heavy-duty models it is necessary to fit the Unibase or Circular Sub-base in order to use the Elu/De Walt/Trend bushes. There are some exceptions, however. The main ones are the Trend T10 and T11 and their predecessor the T9. These have the largest range of all, accepting the standard EDT bushes, plus three extra-large ones of 50mm, 60mm and 70mm, plus the bushes supplied with most jigs from independent manufacturers. Standard bushes and those from independent manufacturers are mounted on an inner plate, which is adjustable for alignment, while the three extra-large ones fit directly into the machined recess in the router bases.
The standard bushes also fit directly to the T3, T4 and T5 models, giving compatibility across the entire range.
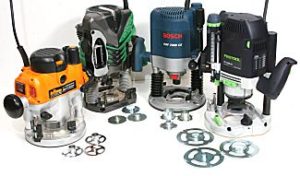
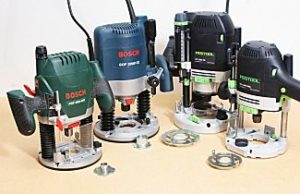
A few other heavy-duty routers have their own range of guide bushes.
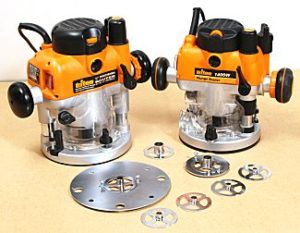
Examples include the Bosch GOF 2000 ACE, the new Festool OF 2200 EB, the Hitachi M12 V2 and the Triton TRA001 2000.
Fitting guide bushes
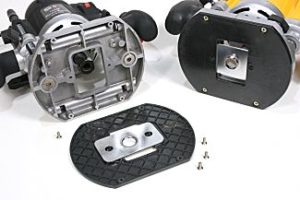
Most guide bushes are fitted to the router base by means of two 5mm machine screws in threaded holes in the base casting. With some models, however, and not only the cheaper ones, fixing is by means of nuts and bolts through plain holes or by screwing into threaded inserts in the plastic dust extractor spout. This can lead to non-concentricity in the bush, make it difficult to tighten the collet nut, and seriously increases the time and effort involved in fitting and removing guide bushes. This, in turn, discourages the more creative uses where cuts are positioned and repositioned by changing the guide bush, the cutter, or both.
At the other extreme the Bosch and Festool bushes require no screws at all. They are fitted and released by means of quick-release bayonet or snap-in fittings in a specially machined base aperture.
Note that the Bosch bushes are common to both Bosch routers.
A few models require the plastic sole plate to be removed from the router: to install a guide bush, to mount a plate to accept bushes, or to set the bush in a moulded socket in the base. The two Tritons are of this type, as are the Chinese-made SIP and JCB models.
Guide bushes and dust extraction
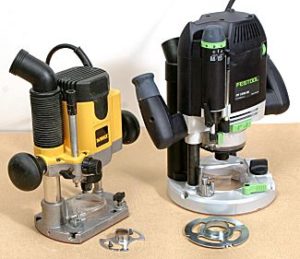
Generally speaking, fitting a guide bush to your router reduces the efficiency of the dust extraction. The exceptions are those few routers designed with dust extraction as a priority and guide bushes that support good extraction. The best examples, in my experience, are the De Walt DW 621 and the Festool 1400 and 2200 models, with their built-in dust extraction and guide bushes designed in skeleton form.
If you plan to do much guide-bush work with MDF or one of the irritant hardwoods, you would do well to consider the dust extraction question very seriously.
Home made jigs and templates
When we come to guide-bush work with home-made jigs and templates we have to consider two factors which do not arise with commercial devices:
1. The template or jig must be made of material thick enough to give clearance to the bottom of the bush. In practice this means having the template slightly thicker than the projection of the flange, but you do not want it thicker than necessary because it reduces maximum depth of cut.
2. The cut takes place at a distance from the edge of the template. This distance, called the ‘offset’, depends on the combination of cutter diameter and guide bush diameter and has to be allowed for when making a template. It is calculated as follows: ½(outside diameter of guide bush – diameter of cutter).
Thus with a guide bush of 20mm diameter and a cutter of 10mm diameter the offset is ½(20 – 10) = 5mm.
Whether the template has to be made that much larger, or that much smaller, than the final product depends on whether the template is an ‘inside’ one or an ‘outside’ one. With an inside template the cut is smaller than the template but with an outside cut the cut is larger than the template.
A simple example
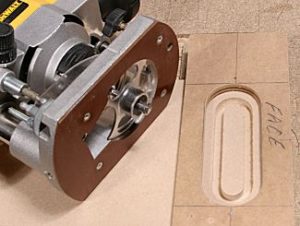
Whenever I acquire a commercial jig I make a mounting board for it and I make it so that it looks as if it is designed for the jig in question. I cut handholds for carrying and hanging the jig, and I put a decorative moulding on the edges of the board and the handholds, with a bearing-guided cutter.
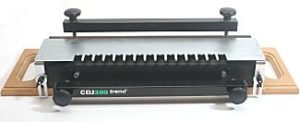
The handholds are cut using a very simple home-made template, a 24mm guide bush, and an 8mm cutter. An example is a mounting board made for the Trend CDJ300 dovetail jig. The handhold is an ‘inside’ cut, so the template is bigger than the required hole. Details of the template and the cut will be given in a future article.
With the hand-holds completed, they and the board’s edges are decorated with a 1/4in radius bearing-guided ovolo cutter.
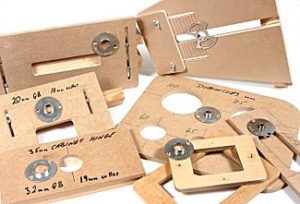
Making simple jigs and templates for use with guide bushes has a spectacular effect on bringing your router to life and opening up possibilities of creative work.
American-type bushes
In the USA, guide bushes have traditionally been of two-part construction with a circular bush held by means of a threaded ring through a hole in the router sole plate. This type of bush has been creeping into the UK with the spread of Leigh and De Walt dovetail jigs, and has now got to the stage of Trend offering them in a range of diameters. Trend also offer a special circular sub-base to mount these bushes.
Most of the popular boxed sets of this type of bush are pretty useless for general routing work because they have such a limited range of diameters, but the Trend range (which is in Imperial measure) is much more useful, running from 7/16in to 2 1/8in diameter.
The following items are available to buy online:
