GUIDE BUSHES PART THREE: COMMERCIAL JIGS
Guide bush work with commercial jigs ranges from relatively light applications such as hingeing, to heavy-duty jobs such as lock mortising and kitchen worktop mitring. In between are the medium-duty applications such as dovetailing, and mortise and tenon cutting.
Hinge Jigs
There are two main types of hinge jig: the professional door-length adjustable jig for recessing hinges in doors and door frames, and the simpler, less expensive, butt hinge jig for setting hinges in replacement doors, where the frame is already recessed.
Both types work with guide bushes. As an example of the simpler type, I’ll show the use of the Trend Butt Hinge Template. (Trend call this a template but I regard it as a jig).
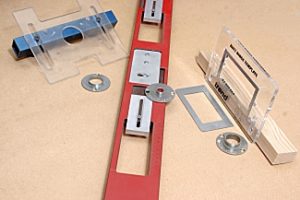
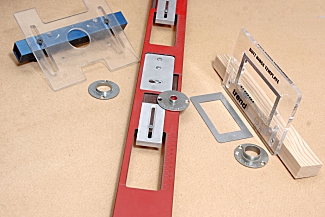
The jig consists of a small sheet of clear 8mm thick plastic, recessed to take two metal templates: one for 75mm and the other for 100mm hinges. The metal plates are held in the plastic by two embedded magnets, and the plastic is mounted on a user-supplied length of batten. Two clamps are also required, to hold the jig to the door.
The jig requires a 30mm guide bush and a 12mm diameter straight cutter. As with several other Trend jigs and templates, these requirements are printed on the template.
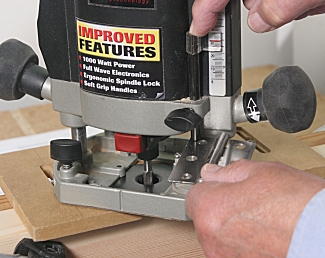
The position of the hinge is marked on the edge of the door, the jig set on the batten with the appropriate metal template in place, and clamped to the door edge.
The cutter and guide bush are installed in the router and the depth of cut set by plunging the cutter to the surface of the door and using a flap of the hinge as a feeler gauge.
The cut is made by taking the router in a clockwise direction around the metal template and then traversing the wood to take out the remainder. The inner corners of the cut will be rounded and will need squaring with a chisel.
This is a shallow cut and a lightweight router is adequate for the job.
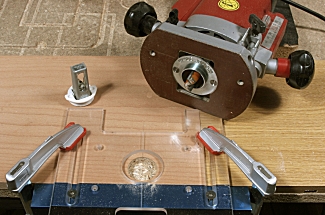
This type of jig often includes a circular cut-out for setting kitchen cabinet hinges.
Dovetail jigs
Dovetail jigs are probably the most widely used of the guide-bush based commercial jigs. They come in a range of complexity and capability, with a correspondingly wide range of price. Most, but not all, use a guide bush to steer the router in and out of the template comb.
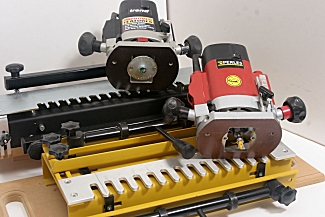
The alternative is to use a bearing-guided cutter, where the bearing is mounted above the cutter blades. The bearing takes the place of the guide bush as a method of steering the router.
I prefer to use a guide bush, but with a bearing-guided cutter there is no bush and therefore no question of ‘Does the guide-bush fit?’
Basic dovetail jigs usually have a single guide bush and only one cutter. They are limited in what they can do; as supplied most have a single template comb, which enables half-blind (front-of-drawer) joints to be cut. Additional templates, cutters and guide bushes are available but if you go down this road, acquiring the additional items, you might find yourself spending more than you would on a more advanced jig to start with.
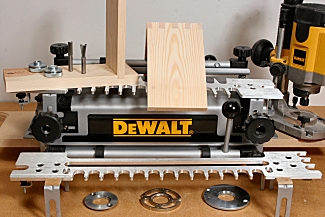
More sophisticated jigs include the De Walt, the Leigh and the Trend DC400. The De Walt is a fixed-template jig, with all the limitations that go with fixed templates, but it is the most complete jig of its kind.
Dovetailing is fairly heavy work, even with a small cutter, because you cannot take three light passes with a dovetail cutter; the cut has to be made with one pass. I would be reluctant to do much dovetailing with a router of less than 800w and usually use one of between 1000W and 1400W, such as the new Trend T5, the De Walt DW622, or the Hitachi M8V2.
In addition, I would not tackle dovetailing unless my router was fitted with a fine height adjuster of the kind that prevents the router rising on its plunge legs if the plunge lock is inadvertently released. Not only does this make setting depth of cut (which is critical for most jigs) quick and accurate but it is also a potential safety factor. Many dovetail jigs e.g. the De Walt, Leigh, Screwfix, use small diameter guide bushes, which are much narrower than the bottom of the cutter. You would not want a rotating cutter – even if the router had been switched off – trying to come up through the bush if you automatically released the plunge as you finished the cut.
Narrow guide bushes also present another problem with dovetailing. Because the cutter is wider than the bush, the bush has to be installed first, the router plunged until the collet is just above the bush, and the cutter shank threaded through the bush into the collet. This makes it awkward to fit the spanner to the collet to tighten it.
An extreme case is the Triton 1400, a router with excellent dust extraction aided by clear plastic shields on the base to channel the dust. With narrow guide bushes, at least one of these shields has to be removed in order to get the spanner on to the collet.
The problem has been eased with several of the more recent jigs by making the guide bush of larger diameter and reducing the width of the fingers on the template comb. This allows the cutter to be fitted before the guide bush, and can be seen in the Trend jig in Pic 10.
Other dovetail jigs
One or two popular jigs, of North American origin, come with American style bushes or offer the choice of American or screw-on types.
De Walt
The De Walt 6212 jig comes with two sizes of American-style bushes: 19mm (3/4in) and 11.1mm (7/16in). Three adaptor plates also come as standard to enable the bushes to be fitted to the De Walt 615, 621, 622, 625 and 626 model routers.With other makes and model, there may already be suitable bushes in the router manufacturer’s own range. If not the special Trend circular sub-base for American style bushes can be used.
Leigh
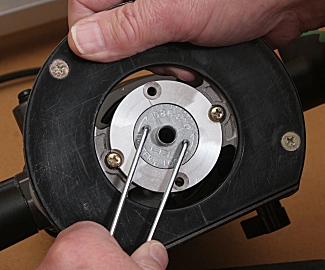
The classic Leigh jigs – the D4 and 1600 – offer the choice of American-style or Trend-compatible bushes. The newer Superjigs come with an American-style elliptical bush, which can be adjusted to alter the effective diameter. This feature is used mainly for finger jointing; for most applications the standard 7/16in (11.1mm) Leigh bush can be used.
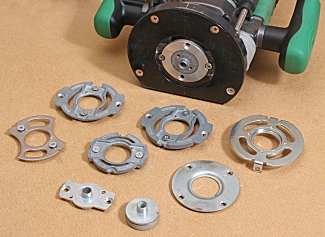
Note that Leigh also supply adaptor plates to enable both their standard and e-bushes to be fitted to a range of routers.
Mortise and tenon jig
Not all mortise and tenon jigs work with guide bushes but the Trend jig is one that does.
It comes with five plastic guide bushes ranging from 5/8in to 1/1/4in (the jig is of American origin) and one steel bush of 1in diameter. The steel bush, however, has a collar which converts it to a 2 1/8in bush, used for all mortise cuts.
The jig can be used with any medium powered router that can take the bushes. As usual, the Trend sub-bases can be fitted to non Trend-compatible routers.
Tenons
To cut tenons, the appropriate guide bush and cutter are installed in the router, the workpiece clamped vertically in the jig and the top plate and adjustable templates positioned over the workpiece.
The cut is made in a series of light passes in a clockwise direction around the template. Care must be taken to keep the router pressed against the edges of the template at all times. If you let the router come away from the template the cutter will remove some of the tenon.
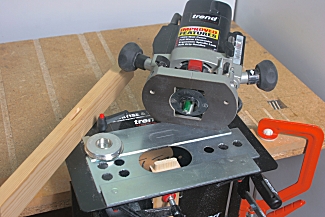
This is an important point. With most guide-bush work you aim to have the jig or template designed so that if you wander off its edge you will be in the waste material and not spoil the cut. With this particular application you cannot do this, so you have to concentrate on keeping the bush against the edge of the template.
Mortises
For mortises, the workpiece is clamped horizontally in the jig. The settings remain exactly the same as for the mortise. This enables either mortise or tenon to be cut first, unlike hand methods where the mortise is usually cut first and the tenon made to fit it.
A straight cutter of diameter to match the width of the tenon, and the steel bush complete with collar, are mounted in the router.
The collar on the bush fits snugly in the metal template, which controls the length of the cut and keeps it straight. The cut is made, as usual, in a series of light passes.
As set up in Pic 14 the jig produces a tenon with rounded ends that fit directly in the corresponding mortise. By reversing the metal templates, square ended tenons can be produced, which require the rounded ends of the mortise to be squared with a chisel. As well as normal mortise and tenon joints, the jig is capable of making angled and compound angled joints, plus dowel joints.
Door lock jig
Trend offer two sizes of door jig plus a lighter plastic door lock template. The jigs use a set of interchangeable templates sized for most popular door locks. The templates are made of thin metal held with two magnets set in the body of the jig. For a given lock, two templates are used: one for the deep lock mortise the other for the shallow faceplate.
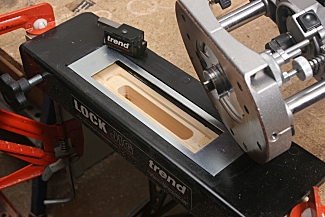
The jigs work with a 30mm guide bush and a long reach 12mm diameter straight cutter, preferably in a powerful 1/2in router.
The deep mortise is cut first, with occasional vacuuming of the dust as the cut gets deeper. When completed, the mortise template is replaced with the faceplate template, the depth of cut set for the faceplate thickness, and the second cut made. The corners of this cut will be rounded, requiring squaring with a chisel or the special corner chisel.
For anyone hingeing doors with a professional jig, a special guide bush and collar is available to switch from hingeing to door lock mortising without replacing the bush. A 16mm guide bush GB160 is used for hingeing, after which a 30mm push-fit collar GB/COLL/1630 is fitted for the door lock.
The 30mm collar is supplied with the door lock jig, but for Pic 15 I used a straightforward 30mm guide bush.
Kitchen worktop jig
Mitring kitchen worktops is about the heaviest guide bush application there is, requiring a powerful 1/2in router, a 30mm guide bush, and a 1/2in diameter straight cutter at least 50mm long.
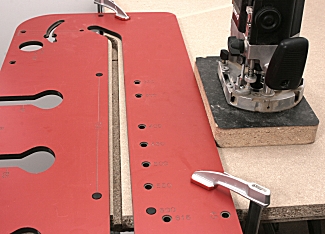
Most jigs are made of phenolic board, the basic ones around 10mm thick, increasing to 15 or 16mm for the professional versions. This is one of the situations where you check the projection of your guide bush and take the appropriate steps if it is too long for the jig.
Kitchen worktop jigs are easier to use than people sometimes think. The jig is positioned by means of pegs inserted in the appropriate holes and clamped firmly to the workpiece. Long jawed F-clamps are very useful for this task.
The secret of worktop mitring is that the jig is always used the same way up and the workpiece turned over as necessary for left and right hand ends of the worktop.
The 30mm guide bush runs in the slot in the jig. This slot is often a little bit wider than 30mm, which causes newcomers to the job to think that their jig is too wide or their guide bush too narrow. Neither is the case; the slot is deliberately made 1mm or so wider than the bush.
The cut is made in a number of light passes with the guide bush pulled against the outside edge of the slot. When this cut is completed, a final cut is taken at full depth with the router pushed against the inside edge of the slot giving a final light trimming cut to ensure a clean finish.
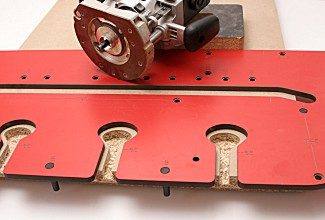
Being a heavy-duty application, some manufacturers recommend a guide bush with a longer spigot than normal if you do much of it. For example, Trend offer a special 30mm bush GB30/A with a 10mm long spigot as an accessory for worktop mitring.
After cutting the male and female halves of the joint, sockets for the metal connectors, the ‘wishbones’, that hold the joint together, are cut in the underside of the worktop.
Basic jigs have just one wishbone aperture, more sophisticated ones have three so that the jig has to be positioned only once.
Some jig manufacturers recommend that the joint be strengthened and stabilised with a biscuit joint. This certainly strengthens it, but care must be taken when cutting the biscuit slots in order to avoid a joint which is not quite level. I have met kitchen fitters who never use biscuits, for this very reason.
The following items are available to buy online:

