MAKING RECTANGULAR TEMPLATES
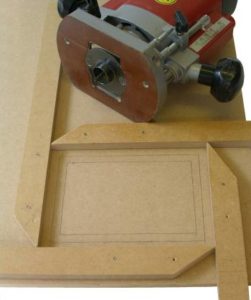
 Templates for straight-sided figures can be easily made using a few straight ‘sticks’ of MDF plus your router, guide bush and a straight cutter. The picture shows an example, which happens to be a template for photo frames. The size of the centre opening will depend on the size of the print for which the template is being made.
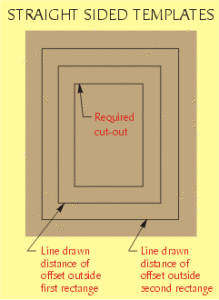
Select your guide bush and cutter and calculate the offset. Now draw on a piece of 9mm MDF the actual size rectangle for the desired print size. Around this first rectangle draw a second one bigger all round by the guide bush/cutter offset. For example if you are using a 30mm guide bush with a 10mm cutter the offset will be 10mm. Next draw a third rectangle, this one around the second rectangle, and again bigger all round by the offset.
 Pin or tape four straight edges around the outer rectangle, fit your guide bush and cutter and cut clockwise around the inside of the straight edges. Your cut will fall on the intermediate rectangle, which will be the required size to act as the template for the final workpiece.
When making the cut, a piece of the same thickness MDF taped in the middle of the workpiece will prevent the router tilting.
The outside shape of the template can be made in a similar fashion but it is easier to simply cut it out with a saw and sand the corners round.
The diagram shows the layout of the rectangles.
