SURFACING AND THICKNESSING
 Surfacing and thicknessing with the router and a suitable cutter is particularly useful in two specific situations:
When you have a number of small pieces of quality hardwood left over from a bigger project. They can be used to make small boxes or miniature furniture etc. provided they can be brought to equal thickness, but they are likely to be too small to easily pass through a thicknesser.
When you wish to put a smooth surface on difficult timbers such as elm or maple, where planer/thicknessers are likely to tear the grain.
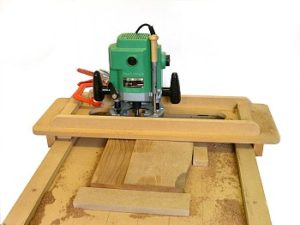
 The basis of the technique is a simple flat table plus a means of supporting the router over it. My table is made of 18mm thick MDF and fits over the pegs on my Workmate. It could equally be held by means of a batten glued to its underside. Size is not critical; mine is 900mm x 600mm. Strips of the same thickness MDF, 50mm wide, are screwed to the outer edges to provide guides to the router support system. A third strip, 75mm wide, is made to clamp to the table top as an intermediate router support for certain applications. Lines parallel to the edges of the table are drawn on the surface with a ball-point pen to help position the workpiece.
 Supporting the router
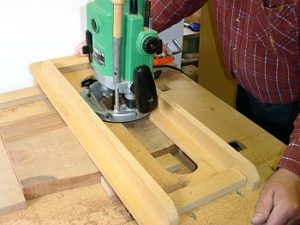
I use several different methods. For heavy-duty work I have made a “bridge” in 15mm MDF to span the width of the table. The bridge is stiffened on its upper surface with strips of MDF which also locate the router. A slot the width of your router base aperture is cut in the bridge to let the cutter through and maximise visibility. When used with material more than 25mm thick I raise the bridge with two strips of 18mm MDF taped under it.
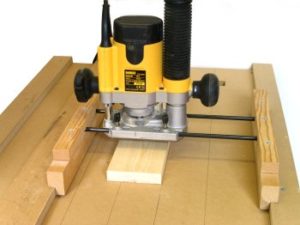
For lighter work I mount the router on home-made “skis” fitted to the ends of the fence rods. These are used with both 1/2″ and 1/4″ routers.
Cutters
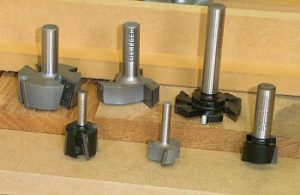
The cutter used should give clean bottom cut and, preferably, be made specially for surfacing. Suitable cutters include the T2410 and T2420 1/2 surface trim cutters, the T2144 – 2148 range of bottom trim cutters and the T6150 1/2 6-wing surface trimmer.
 Using the surfacing table
The workpiece can be held to the table with double-sided tape, hot-melt glue or, if the wood is thick enough, strips of batten taped round it Note that if the timber is thin and cupped, it should not be pressed flat to the table for the initial flattening, otherwise it will spring back to its curl when the tape is removed. Hot-melt glue is better, with scraps of veneer, Formica etc. packed around the edges so as to avoid rocking as the cut proceeds. Take light cuts, clamping the router for each pass if necessar . With the router clamped to the bridge cuts can be made with the rotation to give the best finish. Once one side is trued you will have a flat surface to fasten to the table, and double-sided tape becomes a more practical method of fastening.
Note: You can help release a hot-melt glued workpiece by using acetone to soften the glue.
The surfacing table can be used for very accurate thicknessing if the router is fitted with a fine height adjuster. Once the first side is trued, thickness can be measured with a vernier gauge and the cut taken down in very light steps until the required thickness is achieved.
