WHAT TO LOOK FOR IN A ROUTER TABLE – PART TWO
 Routers for router tables
The first and main consideration is size and power for the intended purpose. Many workers use a router table because they wish to use some of the largest cutters in the catalogue which are not meant for hand-held use. This calls for high power, a 1/2 inch collet and variable speed to get the best out of the cutters.
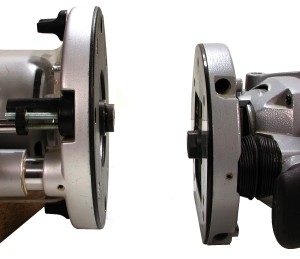
After power, the most useful feature of a router intended for use in a table is a collet that plunges through the base plate to retrieve depth of cut lost because of the thickness of the insert plate. Unfortunately, few of today’s routers have this facility. Several medium-duty models plunge a millimetre or two through the router base but with heavy-duty models only the current Freud 2000E and its several clones, plus the Triton can plunge the collet through the router base.
Photo 1 shows these two routers with their collets fully plunged.
 The collets themselves should ideally be of the multi-slit tapered variety as used in the De Walt DW 625, Trend T9, Freud 2000 and other top-class models. Equally important for 1/2 inch routers is that narrower shank cutters i.e. 1/4 inch and 8mm, should have a proper collet, not rely on reducing sleeves. The models mentioned above all have proper collets available for the narrower shank cutters.
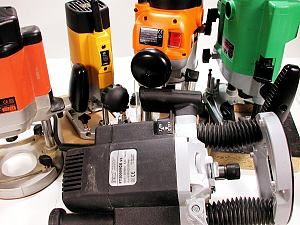
A simple switch is a useful asset, overcoming the need to clip or strap the switch ‘ON’ and operate the router via an NVR switch. The latter, however, is as useful for its convenience as it is for the safety aspects.
Photo 2 shows a selection of routers with simple switches.
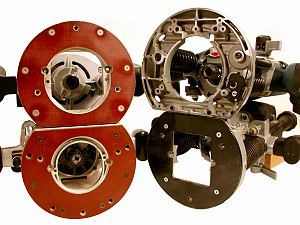 A good size aperture in the router base enables large cutters to be lowered to make the initial light cuts, and adequate fixing points give you a wider choice of table since you are not limited to clamp or fence-rod based models.
Photo 3 shows some routers with good sized base apertures.
With regard to setting depth of cut, a fine height adjuster is a valuable accessory but better still is the WoodRat PlungeBar, which, for me, has transformed the use of a router in a table.
A recent introduction from the USA is the Router Raizer, which is an excellent fine height adjuster for both hand and table use. Fitting it to your router, however, can be quite a complicated job for the average user, depending on the particular model router.
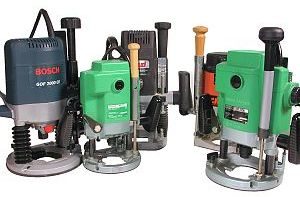 Photo 4 shows a selection of routers fitted with fine height adjusters.
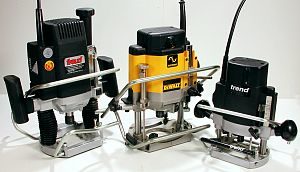 Photo 5 shows three models fitted with PlungeBars. One of them, the DW 625 also has the Router Raizer fitted.
 Attaching the router
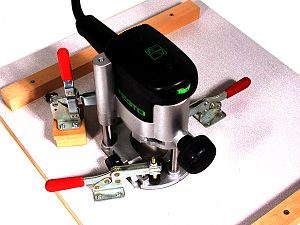
Methods of attaching the router range from simply screwing under the table top, screwing to an insert plate, clamping, or using the fence rods. Clamping systems are useful for routers that do not have convenient built-in fixing points. Photo 6 shows an example. My little Festool 900 model is secured with three toggle clamps to a precise recess cut in the underside of the table top.
Some commercial insert plates come ready-drilled for specified routers. Others require the user to drill the appropriate holes. The ready-drilled plates are mostly drilled to match the three standard Elu/De Walt/ Trend 6mm threaded holes.
Photo 7 shows three routers with 6mm fixing holes. Note that the middle one, the Freud, has fixing holes that are nearly but not quite the same as the Elu/De Walt/Trend holes. This is not a problem if you buy an insert plate which you have to drill yourself.
Two other very important aspects of the router mounting system are:
How thick is the mounting or clamping point?
How big is the recess i.e. how much space is there round the router?
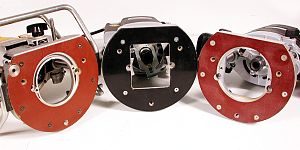 The first of these determines how much depth of cut is lost through the thickness of the mounting point. If more than 8 – 10mm, most moulding cutters will require a collet extension which limits you to 1/2 inch routers. The size of the plate is important if you wish to fit large routers or devices such as PlungeBars to facilitate depth setting and cutter changing. Clearly the method of mounting the router can affect ease of installing and removing it. Easiest are clamps and fence rods, although the Record clamp-based table is an exception.
Other straightforward methods include most of the simple plates where undoing two or three screws is all that is necessary. Particularly easy is my home-made table for the little Festool, where, as shown above, the router base fits into a recess cut into the underside of the table top and is held with three toggle clamps.
Aperture in router plate
Ideally, the router insert plate needs an aperture large enough to let your largest cutters through, plus a set of reducing rings to suit smaller diameter cutters.
There is also the question of compatibility of router and mounting plate. If the plate aperture is very big, it might not be possible to attach small/medium routers because their fixing holes are closer together than the diameter of the aperture. The Trend phenolic insert plate, which will be used in our home-made table has a good size maximum aperture, but not so big that using the standard Elu/Trend/De Walt fixing holes becomes difficult.
Setting depth of cut
One of the basic problems of table routing is setting cutter depth. A fine height adjuster on the router is a great help; even better is the WoodRat PlungeBar, which enables the proverbial three light cuts to be easily made with a table-mounted router. Some very expensive commercial insert plates are now available which can be wound up and down to set cutter depth, but some of these make it more difficult to install and remove cutters and to remove and replace the router.
