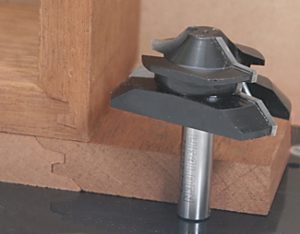
Wealden 45° Lock Mitre Cutter
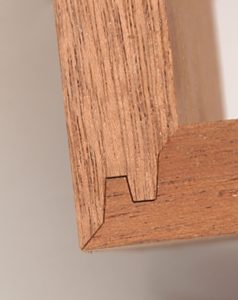
One of the strongest corner joints that can be made with the router is the lock mitre joint. The joint gets its strength from its interlocking fingers and a long glue line. It has the clean appearance of a mitre joint but is easier to glue, since the interlocking fingers align the two halves of the joint. The joint is used in carcase and box construction – loudspeaker cabinets are a case in point – anywhere where a plain or splined mitre might otherwise be used. It is particularly good with heavily figured wood where the grain pattern is carried round the corners, and for veneered boards such as oak-faced plywood or maple-faced MDF. As well as corners the cutter can be used to make flat edge-to-edge joints for panels and tabletops but it comes into its own for right-angle joints.
Wealden offer three sizes of lock mitre cutter, all on 1/2 in shanks. The review cutter is the middle of the range T5596 1/2, catering for material between 16mm and 26mm thick. It is important to match your cutter to the thickness of your project material; the smaller cutter covers 12mm to 16mm, and the larger one 20mm to 36mm.
These are large 1/2in shank cutters and require a powerful variable-speed router mounted in a table. The two largest should be run at 10,000 rpm maximum. All three give cleaner cuts on long grain than on end grain, where you will get a lot of breakout.
Zero-clearance fence
The cuts will be improved if the cutter aperture in the fence is as close as possible to the shape of the cutter, preferably ‘zero-clearance’. A zero-clearance auxiliary fence can be made from a piece of 9mm or 12mm MDF taped to the table fence. The outline of the cutter is rough-cut and the fence is finished by taping the MDF to it and, with the cutter set to its initial height (see below), slowly pulling the fence forward past the cutter to complete the cut-out. More detail will be found in the review of the Drawer Lock cutter.
Make all subsequent cutter and fence settings with the zero-clearance fence fitted.
Set-up
Precise set-up is essential to get good results with this cutter, and the set-up is specific to the thickness of your workpiece. You need a router with a fine height adjuster for accurate height-of-cut setting, and a substantial table fence with fairly high cheeks because one board of each corner joint is taken vertically past the cutter.
For best results you also need the zero-clearance fence.
Note: For your first practice cuts you might choose to use 18mm MDF (or whatever thickness is appropriate for your particular cutter) since it is cheap and plentiful, and you need to practise the set-up routine until it is familiar.
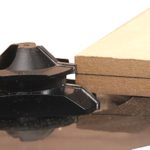
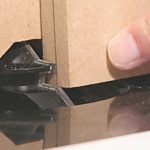
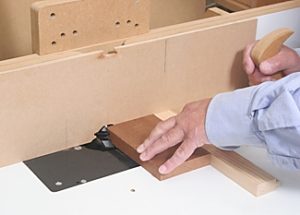
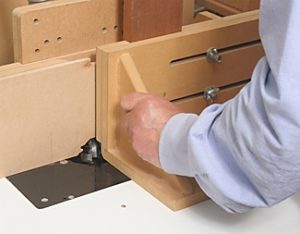
The method that works for me is as follows (see the images above):
- Mark the centreline of a test piece of the material to be used and set the cutter so that this line comes just below the protruding tongue.
- Rotate the cutter so that the tongue is in its furthest forward position and set the fence so that the centreline on the test piece is lined up with the outside edge of the tongue.
- These two steps give the initial positions of cutter and fence.
Establish the exact cutter height by means of test cuts. Make a cut flat on the table in a short length of the work material. It is crucial that the test piece should be the same thickness as the project material.
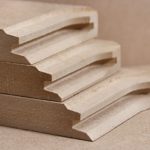
Cut the test piece in half, reverse one piece and fit them together as a flat joint. You will have one of three results. In the picture, from top to bottom, we have (first two greatly exaggerated): cutter too low; cutter too high; cutter just right.
Adjust the cutter as necessary and repeat until the two boards are level. Note that very slight adjustments of your fine adjuster will affect the fit of the two pieces so proceed in small steps. Keep the successful test pieces to use as setting pieces for future joints.
Now set the precise position of the fence. - With the cutter at its precise height, make a short flat cut in the end of another piece of the material and examine the result. As before, you will have one of three results. From top to bottom: spot on with full bevel on front edge; fence too far forward, blunt edge to bottom of cut; fence too far back, full bevel but front edge of board cut back.Repeat test cuts until fence is in correct position.
Practice this procedure until it becomes familiar, and you’ll be able to quickly home in on the exact settings for other thickness materials. Remember that you have to establish new cutter and fence positions every time you use a different thickness material; so keep your successful test cuts to use as setting pieces for future jobs.
In the following example we used 20mm thick hardwood and went through the set-up routine from scratch.
Making the joint
As with all corner joints, your boards must be prepared so that they are flat and square across the ends. This is particularly important with this cutter.
The right-angle joint is made by routing one board flat on the table and the other one vertically against the fence. If you try to cut in one pass, the cut will be very heavy and difficult to control, especially the vertical cut, so take two or more passes, moving the fence back between cuts.
With each position of the fence, make both cuts; flat cut first, followed by vertical cut. Make the final passes very light ones, to give the best possible finish.
Fence stops
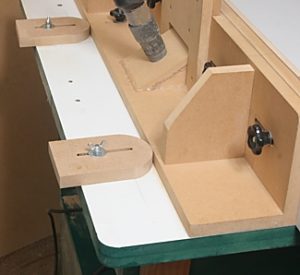
To make the cuts easier, set cutter and fence to their precise positions, using your setting pieces, and clamp two stops to the table top tight behind the fence. This fixes the final fence position and you can now bring the fence forward to make a light first pass, then move it back a little for the second pass, and so on until the final pass is made with the fence back against the stops.
Note that some tables e.g. Triton, include fence stops in the standard kit.
You can make more elaborate adjustable fence stops, securing them with threaded rod and pronged teenuts. You will find them useful for many other table routing applications.
Instructions for making these stops can be seen in the ‘Router Table Tips’ section of Quick Tips
The cuts
Cutting the flat board using a right-angle push block with a breakout piece is straightforward.
The vertical board, however, is another matter. The trouble is that the bottom of the board is cut to a razor sharp edge and as the cut progresses the board tends to sink under its own weight. One way to overcome this is to make a right-angle jig to hold the workpiece in a vertical position as it is passed over the cutter. I based my jig on one designed by the late Roy Sutton and described in his book on router jigs. It is probably the single most effective means of making the cut easier. You still use the fence stops to make the cuts in several light passes.
For larger boards, a length of batten clamped across the board and running on the top of the fence helps, especially if used in conjunction with horizontal featherboards.
When all is spot-on, the result is a neat strong corner joint.
Flat joints
Flat lock-mitre joints are used for making large panels, table tops etc. The cuts are made horizontally, so you don’t have to cope with holding a board vertically past the cutter, but you do have to remember that if there is a definite face side to the boards, one must be machined face up and the other face down
Break out
The lock mitre cutter works best on cuts along the grain rather than across it, but if you are using it for carcase and chest constructions you are likely to make cross-grain cuts and you are bound to get breakout. With the flat cuts you can use a push block with built-in breakout protection (as described in Quick Tips). You might also be able to include such a breakout piece in the vertical jig, but if all else fails you might have to resort to cutting your components a little over width and planing off the breakout after machining.
With smaller constructions it might be possible to rout a wide board and rip the two matching box sides from it, discarding the outer strips with the breakout on them.
Verdict
The lock mitre cutter gives a tremendously strong corner joint with a neat mitred appearance, and can also be used for flat joints in made-up panels, doors etc. It takes a bit of practice to get the best results and the set-up is specific to the thickness of the material being used. It gives cleaner cuts on long grain than end grain and comes into its own with substantial carcase work such as large loudspeaker cabinets. For small boxes, drawers etc. other cutters such as the drawer lock cutter are more appropriate – the lock mitre is the heavyweight of corner joints.

