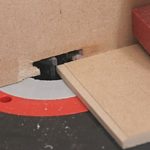
Wealden Drawer Corner Lock Cutter
Traditional drawer construction is based on dovetails – half-blind to join sides to front, and through to join sides to back. Cutting and assembling the joints requires only simple tools – saw and chisel – plus the skill and the time to do it. Their strength and fitness for purpose comes from the interlock provided by the pins and tails, which withstand the stresses of pulling the drawer open.
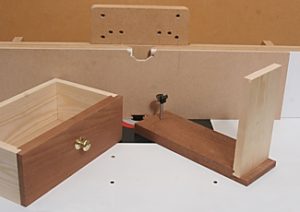
Today’s technology provides us with machine cutters that can make complex interlocking cuts enabling strong and accurate corner joints to be made quickly and easily. One such cutter is the drawer lock cutter. It cuts both halves of the joint with an interlock that holds the joint together and gives a long glue line for strength. In fact, this one cutter is capable of all the machining required for a drawer or box: front and back corner joints, the grooves to take the bottom, and the chamfers to fit the bottom into the grooves.
The Wealden catalogue includes two types of drawer lock cutter: Type A, which is the type used in this test, and Type B, which is a more complicated double-locking cutter. Three Type A cutters are offered: a 25.4mm diameter cutter on a 1/4in shank, the same cutter on a 1/2in shank, and a 50.8mm diameter cutter on a 1/2in shank.
The cutters are for use in a router table, but with the small one used in the test it is not necessary to have a powerful router with variable speed (although I would avoid the little very high speed Far Eastern models). With the 50.8mm version variable speed is an advantage; I would not run the cutter at more than 18,000rpm.
The minimum material thickness the cutters can deal with is 12mm. There is no practical maximum.
Machining
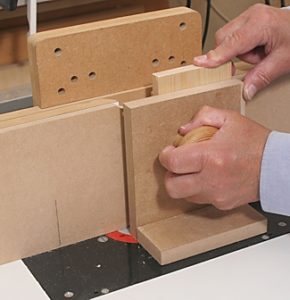
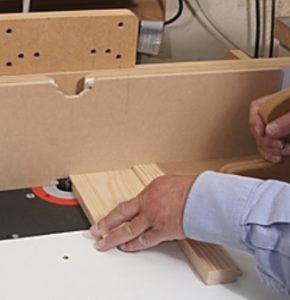
The joint is made by machining one board (drawer side) vertically against the table fence and the other one (drawer front) horizontally with its inside face flat on the table top.
The cuts are made with the cutter at the same height for sides and front, but the position of the fence changes between the two.
Setting up
As usual with complex cutters, setting up is all-important. I find the easiest way with an unfamiliar cutter is simple trial and error. It doesn’t take long; once you have got it you can cut a setting piece to speed up the process next time; and you will learn a lot about the cutter in the process.
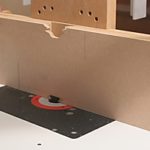
Before starting the set-up procedure, it will pay you to make a ‘zero-clearance’ fence to attach to your table fence. This is simply a length of hardboard or MDF with a gap cut by the cutter itself to give the minimum possible clearance around the cutter. Not only will this give you cleaner cuts but it also provides an unbroken vertical surface to run your drawer sides against to prevent them tipping into the cutter aperture.
Make the zero-clearance fence tall enough to support the vertically machined components and attach it to your table fence with double-sided tape. You can rough-cut the opening with a scroll saw or band saw, and finish it with the cutter, or you can do the whole thing with the cutter itself.
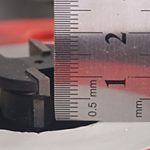
Install the cutter and raise it to 10 – 12mm above the table top. Bring the fence forward so that it is in front of the cutter and tape the MDF to it. Switch the router on and carefully push the fence back allowing the cutter to cut its way through the MDF. Don’t worry if there is splintering on the outfeed side of the MDF.
You can now proceed to set the exact cutter height. Start by setting the cutter 10mm above the table top. This is your first shot and will be fine tuned with test cuts. A fine height adjuster fitted to your router or a rise-and-fall table insert plate is a virtual necessity.
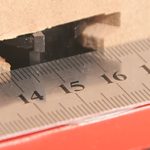
Now set the fence – complete with zero-clearance fence – so that the smaller diameter of the cutter is exactly in line with the fence. Use a straight edge across the cutter for this.
Take two test pieces and cut them vertically with their faces against the fence. Don’t worry about breakout at this stage.
Fit the two test pieces together. If there is a gap, the cutter is too low; if the two pieces won’t go together the cutter is too high. Reset the cutter accordingly and try again. When you have got a good fit keep one of the test pieces in case you have to start again.
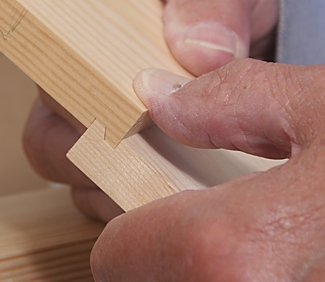
Setting the fence – drawer sides
With luck, the initial setting of the fence with the straight edge will be correct, and can be confirmed from your test cuts above. The idea is that only the upper tongue of the cutter should protrude in front of the fence. When you are satisfied keep your successful cut as a setting piece for both cutter height and fence position.
N.B. This cutter-height setting is the correct height for any thickness of board (remember minimum 12mm). You do not have to reset it for a different thickness drawer side. Nor do you have to reset it when moving from drawer sides to drawer front and back.
Setting the fence – drawer front and back
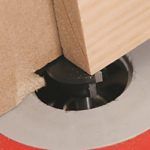
Rotate the cutter so that the upper tongue is right forward and set the fence back so that the front edge of the drawer side board is exactly flush with it. The easiest way to do this is to use a piece of the board as a gauge.
The two different positions of the fence – forward for the drawer sides, further back for drawer fronts and backs – are the only changes necessary when moving from sides to fronts/backs. The cutter height remains the same and does not change with different board thickness.
Rebated drawer fronts, clever drawer bottoms
The cutter is not limited to flush-front drawers. If you are making a rebated front the only difference is that the fence has to be set back by the thickness of the drawer side plus the width of the rebate.
You don’t have to cut the end rebates first, but if using the 50.8mm diameter cutter you should take more than one pass.
A final trick you can play with this cutter is to groove the boards to take the drawer bottom, and chamfer the bottom to give an exact fit in the groove. Return the fence to the drawer-side position and rout the groove in the boards by running them vertically past the cutter. Run the cuts right through the ends of the boards; the groove will not be visible when the drawer is assembled.
Prepare your bottom board. The widest part of the groove is about 5mm so the bottom board should be at least equal to this. 6mm or 9mm MDF or plywood works well. Rout all four edges of the bottom with it face down on the table. The chamfer will match the shape of the groove and will give a snug fit that will not rattle.
Breakout
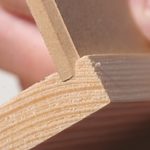
All the cuts for the corner joints are across end grain so it is inevitable that there will be some breakout. This is difficult to overcome while actually making the cut, although the use of a couple of simple work aids helps breakout as well as making material handling easier.
The work aids are a vertical push block for drawer sides and a right-angle push block for drawer fronts. They are seen in use in Pics 2 & 3 and their construction is shown in the Router Table section of ‘Quick Tips’.
Beyond these you might have to resort to more drastic measures, For example, you can cut your boards a little over width, rout them and then plane or saw to size. With small drawers and boxes an alternative is to machine a wide board, trim off the breakout and then cut it down the middle to provide two clean boards.
Verdict
This is a very useful and versatile cutter for making drawers and boxes. It is quick and easy to set up and after a little practice we were surprised at how quickly we could make a complete drawer starting from scratch. Cutter height is a once-and-for-all setting, not dependent on material thickness.
It is a router table cutter but the smaller diameter 1/4in shank version can be used with a medium power single-speed router.
One final thought: it’s a lot cheaper than a dovetail jig.

